Are you ready to improve the strength and durability of your driveway? Your driveway not only connects the road to your house, but it also provides functionality, curb appeal, and long-term property value to your house. Using concrete for your driveway is not just a normal home improvement project, it is an investment in your property’s future. Concrete Driveway Installation may seem like a difficult task, but a proper step-by-step guide will make it an easy and manageable task for you. In this guide by Luxe Lagoon Pool Designs, you will learn how to successfully install a concrete driveway.
Building a Strong Foundation: 10 Steps for Concrete Driveway Installation
Many of you think that installing concrete is just about pouring and letting it dry. Well, it is not as simple as you might think. Concrete driveway installation in Justin, TX is a complex process, so it is always recommended to follow a step-by-step approach to ensure a durable and reliable driveway!
Here is your 10-step concrete driveway installation guide keep reading to unlock the magic!
- Step 1: Plan Your Pave:
In the first step of your concrete driveway installation, you will decide exactly where your driveway will go. Make sure that it slopes slightly away from the house for perfect drainage. Once you decide on the location, check with local authorities, obtain all necessary permits, and review local building codes before you pick a tool!
- Step 2: Dig It Out:
In the second step of Concrete Driveway Installation, you will mark your area with string and stakes, then dig a good 8 to 12 inches deep. Clear out all that topsoil, vegetation, and debris so your foundation is on a solid, even surface and ready for the next step.
- Step 3: Rock Solid Base:
The third step in Concrete Driveway Installation will begin by filling the hole with 4 to 6 inches of crushed stone or gravel to achieve a strong and stable foundation. Make sure you have a proper drainage system under the concrete. After that, use a plate compactor to compact lightly for a hard, firm, and even surface.
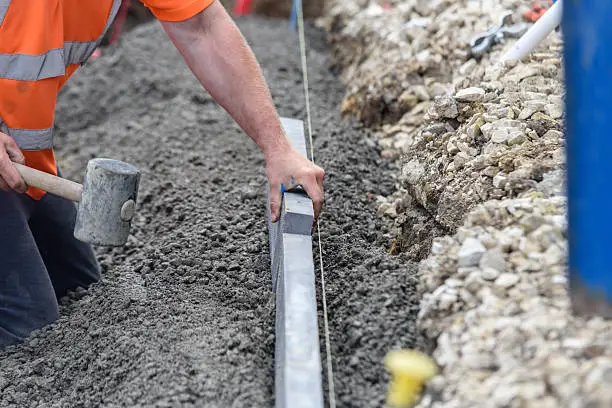
- Step 4: Form the Mold:
In the fourth step of Concrete Driveway Installation, you will use molds to set the concrete. Start by constructing solid wooden frames around the edges of the concrete driveway area. These “molds” hold the wet concrete perfectly in place while it sets. In the end, double-check everything and make sure that the slopes follow the exact drainage process.
- Step 5: Add Some Reinforcement:
Step number 5 starts by laying steel bars or wire mesh in the forms. These bars are the concrete’s skeleton that keeps any cracks from forming and provides heavy strength to the structural integrity. If you want it to work more effectively, then lift it slightly in the slab.
- Step 6: Time for the Big Pour:
Step 6 is the point where the main action happens in Concrete Driveway Installation! It’s time to get the concrete mix it yourself or call in a ready-mix truck. Work from the far side of the pour toward you, making sure to follow an even pattern as you build it up, and then smooth the corners.
- Step 7: Smooth Dancer:
In step 7 of Concrete Driveway Installation, you will grab a straight board and level the wet concrete along the forms this process is known as screeding then immediately bull float the surface to bring the “cream” (the wet concrete mix) to the top. We know it is super satisfying!
- Step 8: Picture Perfect Driveway Finish
After the sheen of the surface water disappears, you will have time to pull out a stiff broom to provide a safe, nonslip texture – this process is known as broom finish. Then use an edger tool to round the perimeter edges for a clean, professional finish that will last.
- Step 9: Score for the Driveway Success:
Every 10 feet approximately, cut control joints about a quarter of the way through depth. This is important, as it indicates the concrete when and where it’s naturally going to crack, ultimately relieving stress and keeping the rest of the slab looking beautiful.
- Step 10: The Final Set:
Curing is crucial! Keep the concrete damp for 3-7 days, wet or use a chemical curing compound. Curing allows the concrete to reach maximum strength. After approximately a month, seal up for maximum protection.
Conclusion
In conclusion, if you carefully follow these 10 steps, your investment will stand for many years. It will not only fight the elements but also add great value to your home. Our expert’s tip is that “Patience during the planning and curing stages really is your best friend.” Now, step back and admire your hard work to enjoy a smooth and reliable entrance that makes it a pleasure to come home every single day!
FAQs
How long does concrete driveway installation take?
The concrete driveway installation usually takes up to 1 to 2 weeks, while completely depending on the weather conditions and maintenance level.
Do I need a permit for concrete driveway installation?
In most cases, yes, you need concrete driveway installation. It is always recommended to check with your local permit code.
How often should I seal my concrete driveway?
It is recommended to seal your driveway every 2 to 3 years, but if you see any serious damage to your driveway, then you should immediately seal it.
How thick should a concrete driveway be?
For most residential driveways, a thickness of 4 inches is standard. Heavier vehicles or commercial properties may require 5–6 inches for added strength and durability.
Do I need to prepare the ground before pouring concrete?
Yes. Proper site preparation is essential. This includes removing old material, leveling the ground, and adding a compacted gravel base to ensure stability and prevent cracks.